Adding a Receive Item
When an order is in Add mode or Edit mode (see "Reviewing a Receiving Order" for information on placing the order in Add or Edit mode), the Add Detail icon that resides above the Details grid is activated and you may add an item to the order:

- To a detail to the order, click the Add Detail icon.
- A line item is added to the order Details grid.
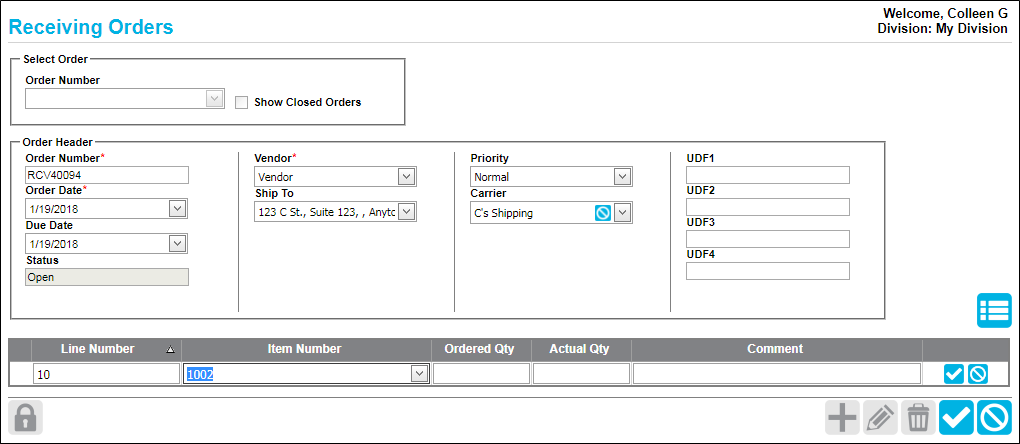
- Line Number (required): depending on the division options setting, the line number is either automatically assigned by the system or manually entered by the user.
- Item Number (required): click the drop-down arrow in the Item Number field and select the item number from the list of items that appears.
- Ordered Qty (required): enter the ordered quantity in this field.
- Actual Qty: this is the receive quantity, which is entered at the Receive Inventory form.
- Comment (optional): enter a comment for this line item.
- Save icon/Cancel icon: Click the line item Save icon
 to save this line item to the order details. If you do not want to save it, click the Cancel icon
  to discard this information.
 - When the line item Save icon is clicked, the line is saved to the order details. The line item icons change to Edit, Delete, and Receive:
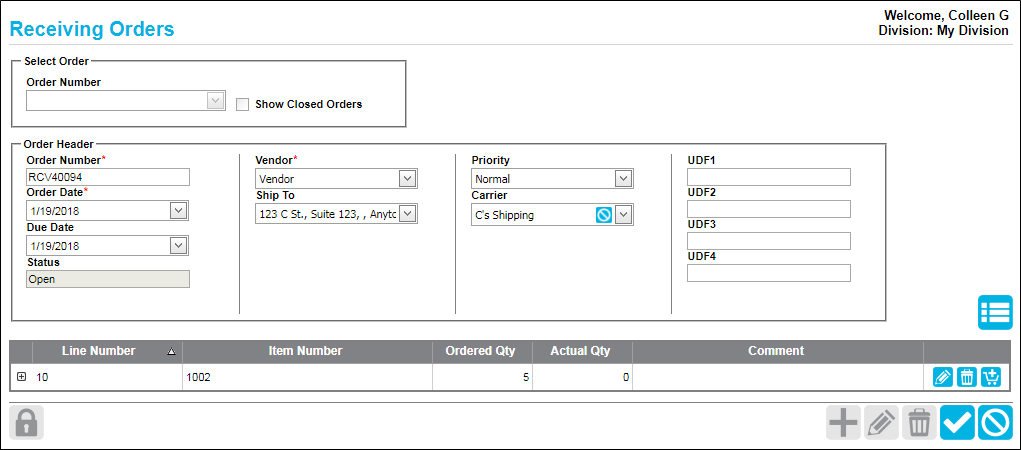
- Once a line item is saved to the order, you may:
- Edit the line item
- Delete the line item
- Receive the line item into inventory
- When you are finished working with the line item, to save your work with it to the order, click the Save icon
 for the entire order in the bottom right area of the page.